
The Shark Who Learned a Lesson: A Craft by @OceanChildCrafts
Paper cup shark craft and fishing game featuring The Shark Who Learned a Lesson!
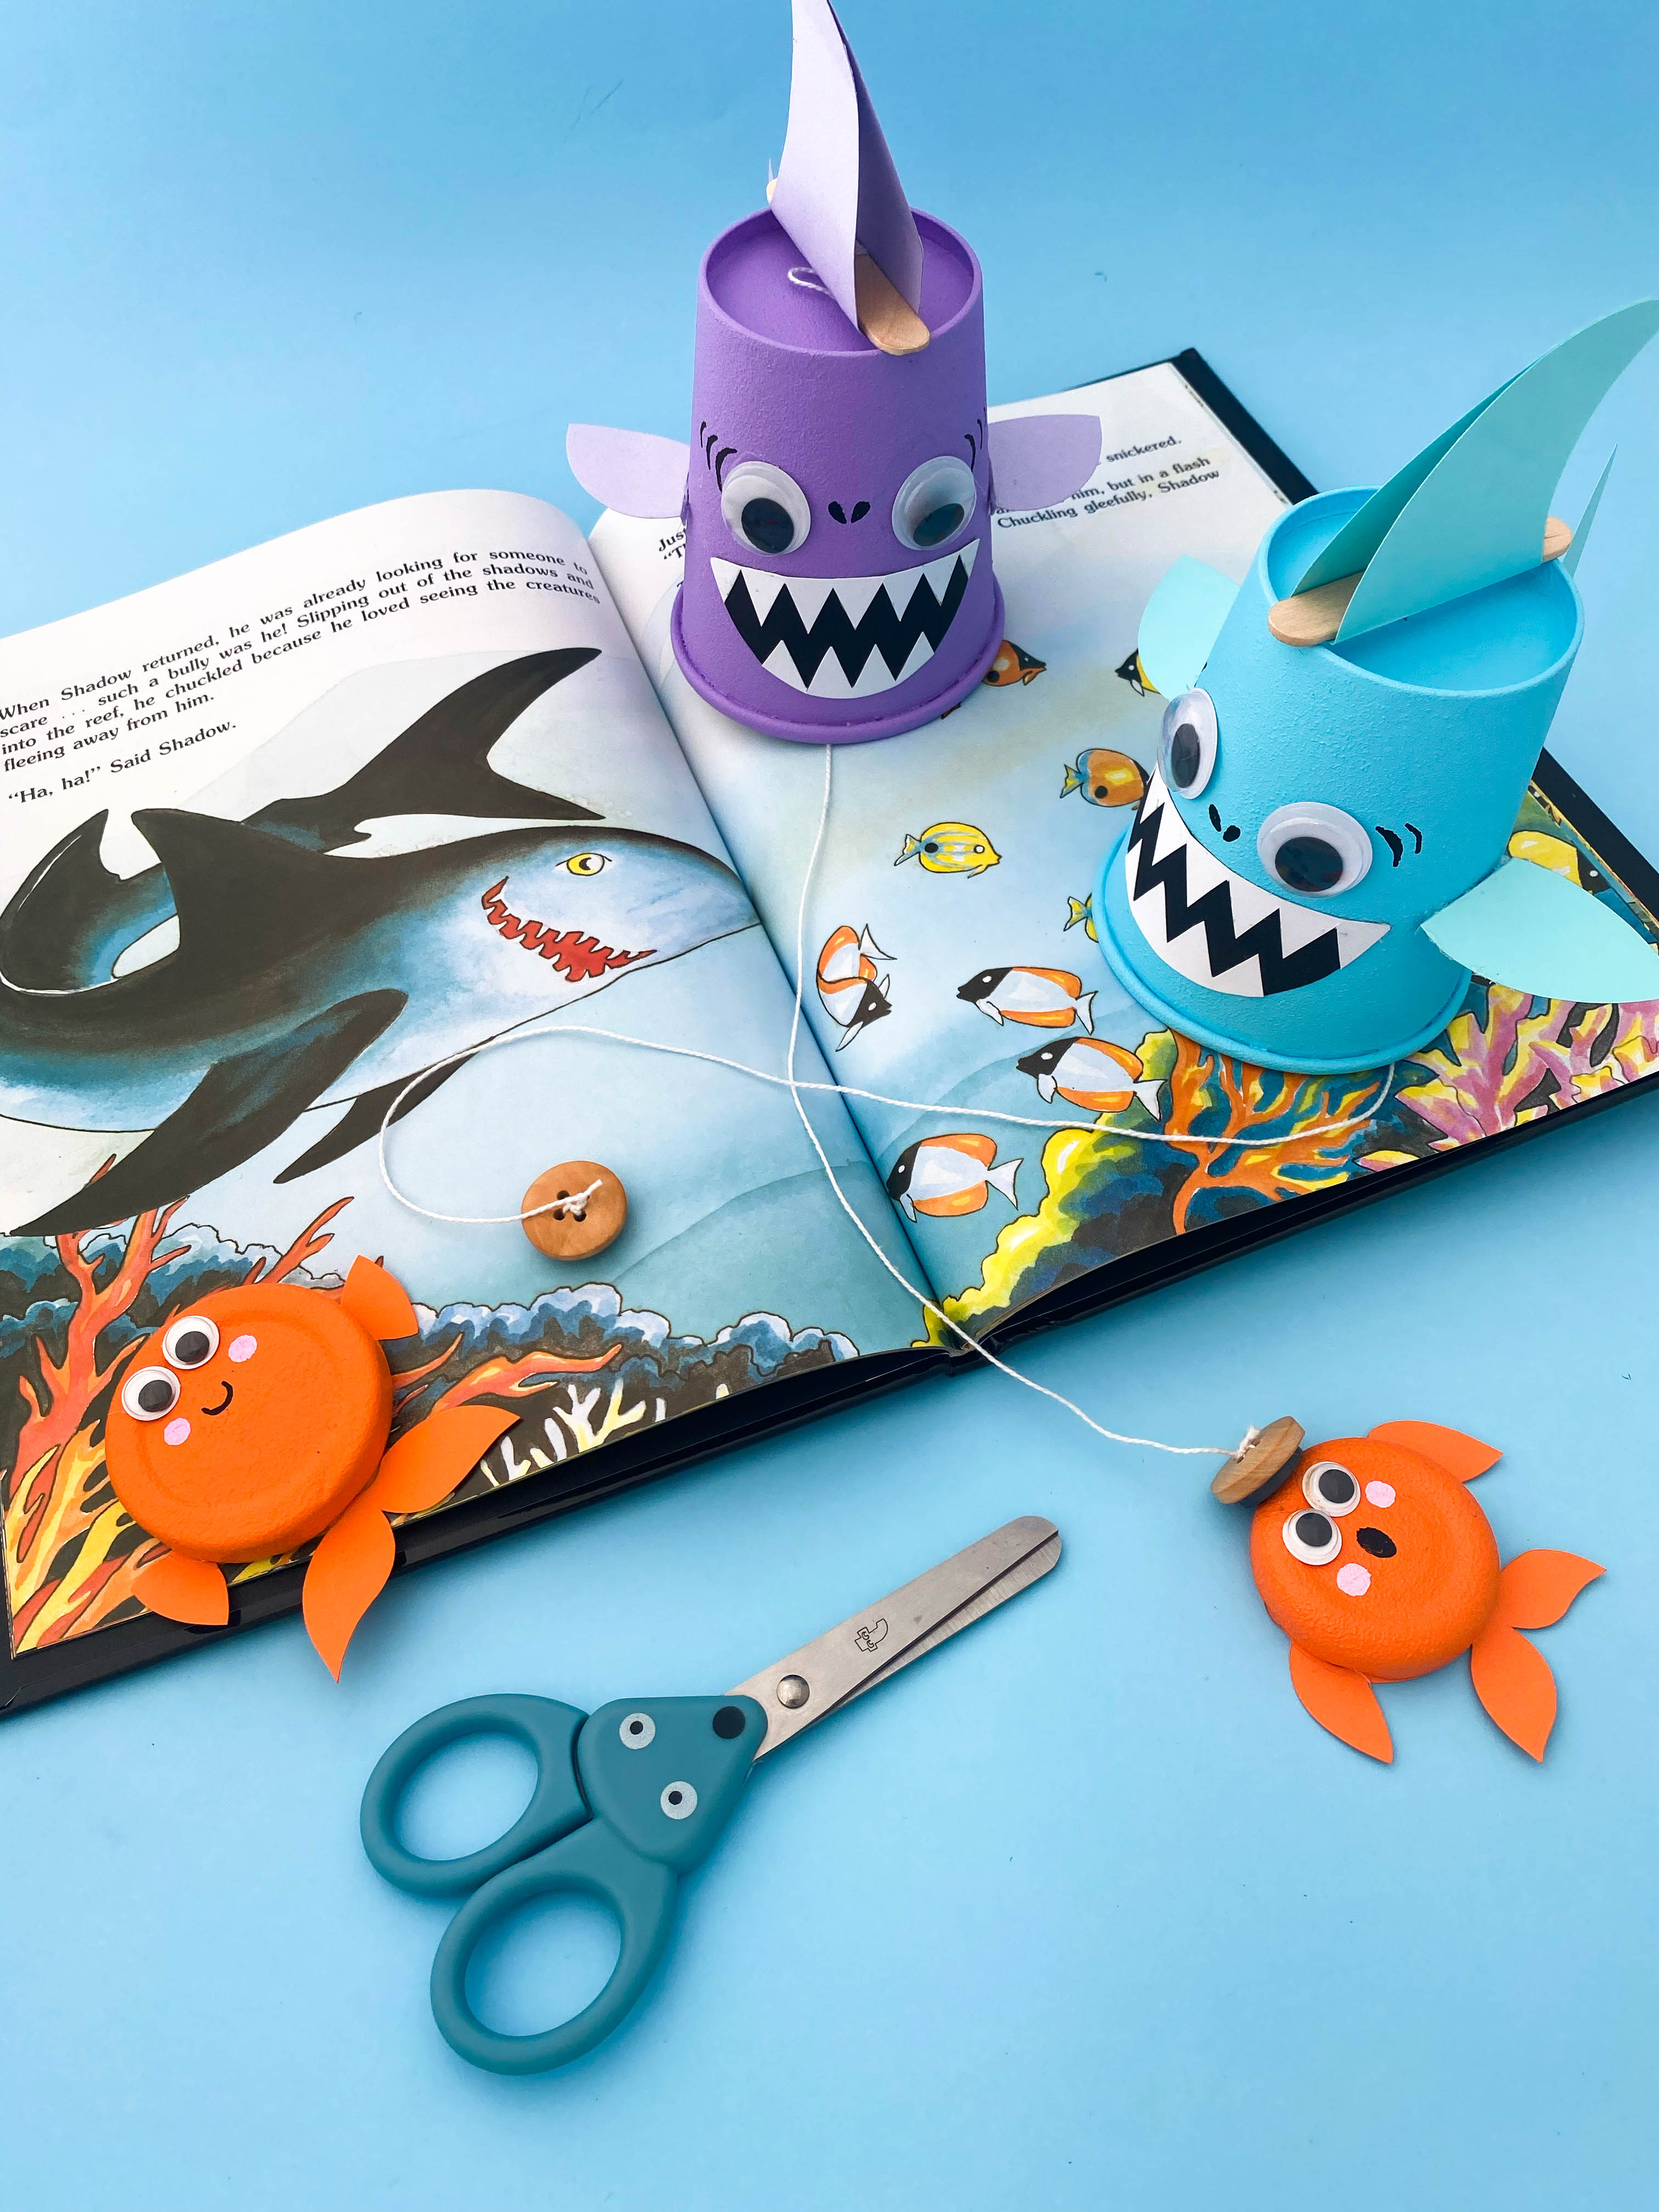
Craft supplies
- Paper cup
- Printable, download here
- Paint for your shark
- Colored paper in the color of your paint
- Mason jar lid
- Yarn
- Small magnet
- Button (optional)
- Black marker or fine liner
- Googly eyes (optional)
- Small (popsicle) stick
- Glue stick and glue gun
Step-by-step craft instructions
Step 1: Gather the craft supplies above and print the printable.

Step 2: Paint the cup with your desired shark color, you can use washable paint or acrylic paint.

Step 3: Create all the body parts of your shark. For the fins, tail, and mouth of the shark, you can use the printable. You can trace or copy the printable on colored paper or color the printable and cut out all the pieces. The dashed lines on your printable are the folding lines.

Step 4: Now you have all your shark pieces, glue your shark together. You can attach the back fin by making a small cut on the backside of the paper cup and slide the fin inside.

Step 5: Take a piece of string as long as you want your fishing line to be. On one end, you glue a small magnet. To make this easier, we tightened a button to the string and glued the magnet on the button.

Step 6: Make a tiny hole in the top of your cup with a craft knife, sharp pencil or skewer. Poke your string through the hole from your paper cup (magnet down). When the string goes through the cup, you can tighten a stick on the other side of the line, the opposite side of the magnet. We used a small popsicle stick, but you can also use a stick from outside or a toothpick/skewer.

Step 7: Take your top fin and fold the fin on the folding lines. You can glue the fin around the stick. Now, you can pull the top fin up, and the magnet will move.

Step 8: Now that your shark is ready, we craft our fish. Take a metal lid and color your top in your favorite fish color. Use acrylic paint to make sure the paint covers the surface well.

Step 9: When the paint is dry, trace the lid on paper. Ensure you have enough space to draw a fishtail and two fins. Cut out the paper and glue the lid on top. The best is to use hot glue to ensure the lid sticks well on the paper.
Step 10: Add two googly eyes, and you can add details to your fish with a marker.
If you enjoyed this craft, checkout out our The Whale Who Wanted to be Small craft by Ocean Child Crafts here!
0 comments